Layouts
The layout of your GUI is how you arrange the widgets in the window.
Widgets can be arranged into "containers" (e.g. App, Window, Box) using either of these layouts:
auto- where widgets are positioned automaticallygrid- you specify where in a grid each widget should be positioned
The layout is set using the layout parameter of the container, for example:
app = App(layout="auto")
app = App(layout="grid")
If no layout parameter is specified, the default auto layout is used.
Auto layout
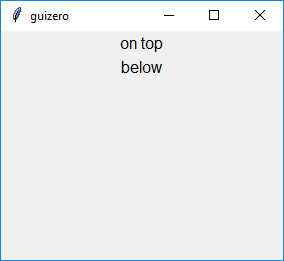
auto is the default layout used when a container is created. All widgets will be arranged in the order they are created and aligned to the centre. For example, the following code will create two Text widgets, one on top of the other.
from guizero import App, Text
app = App()
text_1 = Text(app, text="on top")
text_2 = Text(app, text="below")
app.display()
Aligning
Widgets can be aligned to either the top, bottom, left or right, using the align property when created.
Aligning a widget will cause it to be "stuck" to that side of the container, for example:
from guizero import App, Text
app = App()
top_text = Text(app, text="at the top", align="top")
bottom_text = Text(app, text="at the bottom", align="bottom")
left_text = Text(app, text="to the left", align="left")
right_text = Text(app, text="to the right", align="right")
app.display()

By aligning multiple widgets to the same side of the container, widgets can be made to stack together:
from guizero import App, Text, TextBox, PushButton
app = App()
text = Text(app, text="label", align="left")
text_box = TextBox(app, text="enter text", align="left")
button = PushButton(app, text="submit", align="left")
app.display()
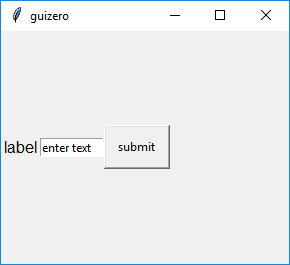
The widgets will stack in the order they are created, so the widget created first will be closest to the edge in the direction specified.
Filling
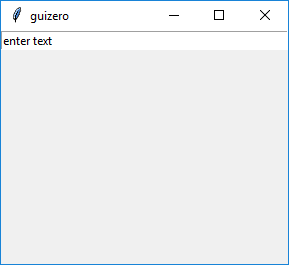
Widgets can also be made to "fill" all available space by setting the width and height parameters to fill. Here are some examples:
A TextBox could span the entire width of the container:
from guizero import App, TextBox
app = App()
text_box = TextBox(app, text="enter text", width="fill")
app.display()
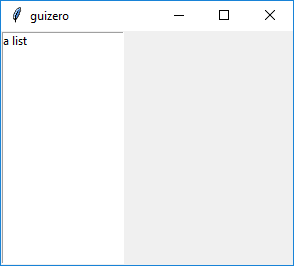
Or a ListBox could fill the left hand side by using fill for the height and align to the left:
from guizero import App, ListBox
app = App()
list_box = ListBox(app, items=["a list"], height="fill", align="left")
app.display()
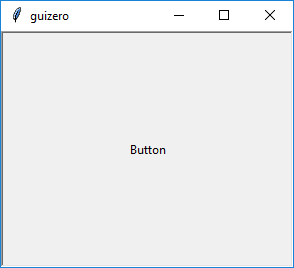
Using fill for the width and the height will make a widget use all of the available space:
from guizero import App, PushButton
app = App()
button = PushButton(app, width="fill", height="fill")
app.display()
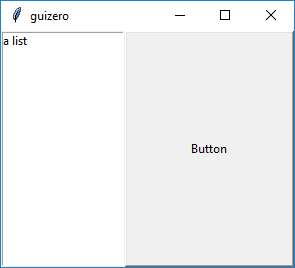
When multiple widgets use fill, the Window Manager (operating system) will distribute the space accordingly between all the widgets which have requested to fill it.
from guizero import App, ListBox, PushButton
app = App()
list_box = ListBox(app, items=["a list", "of items", "yay"], height="fill", align="left")
button = PushButton(app, width="fill", height="fill", align="right")
app.display()
Note : Using fill may not always have the effect you are expecting, as it is up to the operating system to distribute screen space.
Grid layout
The grid layout allows you to position widgets into a virtual grid.
When you create a widget you will need to pass an extra parameter called grid which is a list containing [x,y] coordinates for where you want the widget to appear, like this:
app = App(layout="grid")
text = Text(app, text="Hello world", grid=[0,1])
There is no need to specify the width or height of the grid you want - it will expand depending on the coordinates you provide with each widget. However, grid cells containing no objects will have no height or width.
This is really useful when creating GUIs where you want widgets to line up.
For example, you could create a number keypad:

from guizero import App, PushButton

app = App(layout="grid")

button1 = PushButton(app, text="1", grid=[0,0])
button2 = PushButton(app, text="2", grid=[1,0])
button3  = PushButton(app, text="3", grid=[2,0])
button4  = PushButton(app, text="4", grid=[0,1])
button5  = PushButton(app, text="5", grid=[1,1])
button6  = PushButton(app, text="6", grid=[2,1])
button7  = PushButton(app, text="7", grid=[0,2])
button8  = PushButton(app, text="8", grid=[1,2])
button9  = PushButton(app, text="9", grid=[2,2])
button0  = PushButton(app, text="0", grid=[1,3])

app.display()
You can also align widgets within the grid, which is useful when you are creating a form:
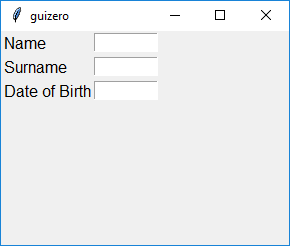
from guizero import App, Text, TextBox

app = App(layout="grid")

name_label = Text(app, text="Name", grid=[0,0], align="left")
name = TextBox(app, grid=[1,0])
surname_label = Text(app, text="Surname", grid=[0,1], align="left")
surname = TextBox(app, grid=[1,1])
dob_label = Text(app, text="Date of Birth", grid=[0,2], align="left")
dob = TextBox(app, grid=[1,2])

app.display()
Spanning columns or rows
Widgets can be made to span multiple columns or rows by specifying the span within the grid parameter. These are optional, but if specified both must be included using the format [x,y,xspan,yspan].
The example below shows a Text widget located at 0,1 and spanning two columns (x) and one row (y):
text = Text(app, text="Hello world", grid=[0,1,2,1])
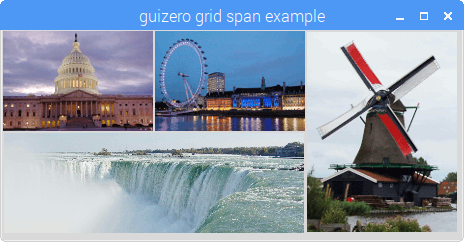
This layout method can be used to include widgets of different sizes arranged alongside each other.
from guizero import App, Picture

app = App(layout="grid")

picture1 = Picture(app, image="std1.gif", grid=[0,0])
picture2 = Picture(app, image="std2.gif", grid=[1,0])
picture3 = Picture(app, image="tall1.gif", grid=[2,0,1,2])
picture4 = Picture(app, image="wide1.gif", grid=[0,1,2,1])

app.display()
Boxes
By using a Box widget you can segment your GUI into different sections allowing you to lay out your user interface in any way you want.
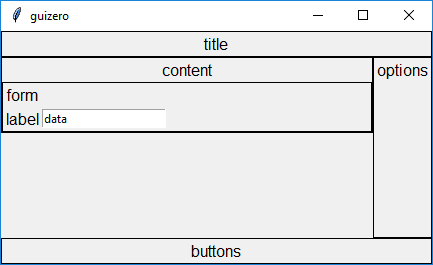
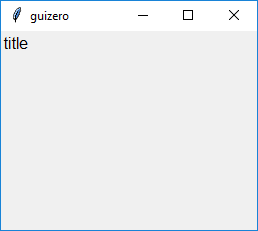
If you wanted to create a title in the top left hand corner of your GUI, you could use a Box which fills the top of the App and put a Text widget inside aligned to the left.
from guizero import App, Box, Text
app = App()

title_box = Box(app, width="fill", align="top")
title = Text(title_box, text="title", align="left")

app.display()
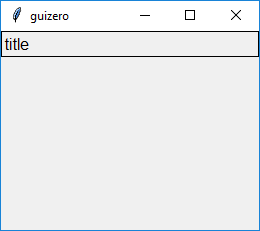
You may find it easier to design your layout if your Boxes have borders, which can be done by setting the border parameter on Box to True.
title_box = Box(app, width="fill", align="top", border=True)
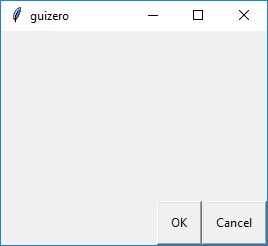
A similar method can be used to put "OK" and "Cancel" buttons at the bottom right of the GUI. Remember that the widgets will get stacked on the right in order of creation, so the cancel button is created first.
from guizero import App, Box, PushButton
app = App()

buttons_box = Box(app, width="fill", align="bottom")
cancel = PushButton(buttons_box, text="Cancel", align="right")
ok = PushButton(buttons_box, text="OK", align="right")

app.display()
Note : You can put a Box inside another Box, allowing you to layer boxes and position your widgets.
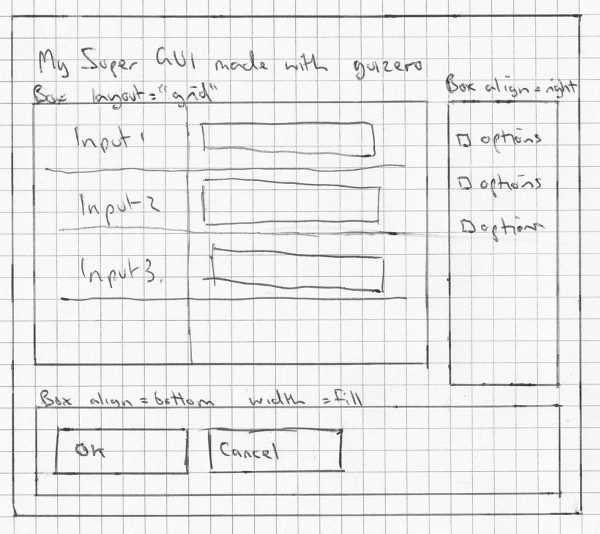
Tip : When creating a GUI you may find it easier to design it first on paper, noting where your boxes will be positioned.
Unfortunately, whilst you can put one box inside another box, guizero does not support mailing it to yourself, nor smashing it with a hammer ;)